I owe you a big thank you (yet again)...
Last week, in the deep, dark, still of the night... as we all were sleeping soundly... our YouTube channel plowed passed 7,000 subscribers and 600,000 views of our videos.
Okay, it may not have been in the still of the night and you easily could have been wide awake, but we really did hit those phenomenal numbers last week.
And as always, when we experience a success it doesn't belong to us, it belongs to you.
We have become (as several publications have said) one of the top photography blogs on the internet and if they're right, ALL of the credit belongs to you, the good people who use your valuable time to read, listen, and watch our humble offerings.
THANK YOU!
Shooting very cool weddings...
I started shooting weddings with Stacey Kane a few years back because I was brave enough to ask. We met at a gathering of wedding photographers and I was thrilled to be introduced to her as Stacey was "Somebody" in the wedding industry.
So one day I drew up the courage and asked if I could second shoot just one wedding with her, I would be her equipment Sherpa, lug water, or whatever she asked, I just wanted to be able to watch her shoot a wedding. Because I'd seen her images and slideshows and really wanted to see how she shot because I don't think anybody tells the story of a wedding day better than her (insert big butt kissing sound here).
:)
Well, she thought I didn't suck as a water lugger so I have been shooting weddings with her ever since.
One of the cool things about working with Stacey is we get to shoot high end, luxurious weddings and (on occasion) the weddings celebrities (the first question from my daughters when I get home is "who was there?" followed by "did you get any pictures of them?").
So the food, the venue, the entertainment is as good as it gets, but because of who these people are, we are often contractually obligated due to non-disclosure clauses not talk about or show images from these weddings.
But I can share a few images from the wedding from last weekend.
The wedding was set on the coast of Maine and as usual, everything was top notch, but during the dinner there was some "buzz" about a surprise.
As we moved from the dining to the entertainment tent we were greeted by none other than Lionel Richie. Yes, I know, by knowing who he his and enjoying his music it makes me old, but I'm okay with that. And yes, having Lionel Richie stare at me as I photographed him was kinda cool.
Dancing your first dance as husband and wife to"Stuck on You" performed on piano by Lionel Richie himself....WOW!
So while Stacey is in the the front of the stage photographing the dancing my job is to shoot things from a different angle.
As I am photographing I see Lionel reach into the crowd and pull up none other than Stacey herself to the stage! She's shooting the crowd, shooting him, having a great time. I am to the side firing like crazy thinking to myself "please be in focus, please be in focus".
And I find out after the fact Stacey is thinking "Scott better be getting this, he better be getting this!".
After Lionel finished his concert the guests were escorted ocean side for a spectacular fireworks display while the next band set up, preparing for the dancing portion of the evening.
It was a looooong day, but I wouldn't have missed it for anything.
More great images from our readers...
Here are some more great images that our readers (and listeners) have uploaded to our Flickr group.
None of these images needs comment on as they are stunning and speak for themselves, that being said, the very last image ("Lock The Bridge") has a great background story and you can read it here.
3 shoe flash mounting bracket for under $10...
Here is a pretty cool, compact, cast aluminum triple mount cold shoe flash bracket that is just $9.99 (includes free shipping).
It includes a shoe mount but it can easily be removed and mounted with/via a stud (you can find a set of 2 stud adaptors here for $5.25, also with free shipping).
One of the things I really like about this is the large thumb screws, they make for easier mounting (and less cursing).
Episode 10 - Our interview with photographer Michael Clark...
Here are the show notes from our conversation with my new photography crush, action, adventure, and sports photographer Michael Clark.
How this all got started was because Peachpit was kind enough to send us his latest book, Exposed: Inside the Life and Images of a Pro Photographer, for review and the admiration started there.
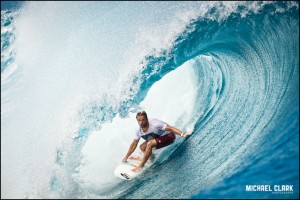
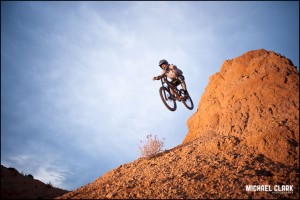
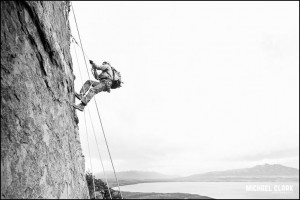
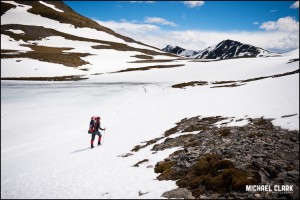
And as I learned more about the type of photography he does and the stunning images he captures I was hooked. There will be more images in this post than we have ever included before, because I just couldn't narrow it down any further than this, so check these out.
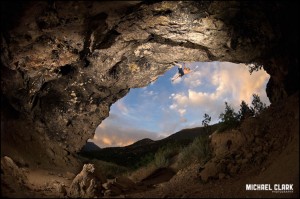
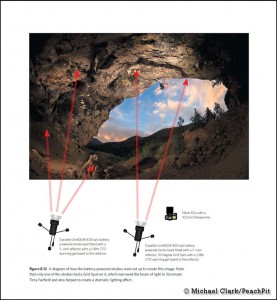
We talked about one of his portfolio images and how it was lit:
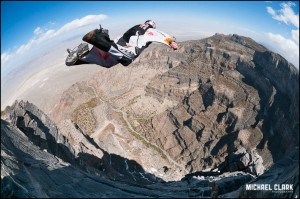
Base jumping (pure insanity):
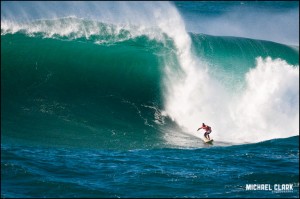
Surfing:
Outdoors:
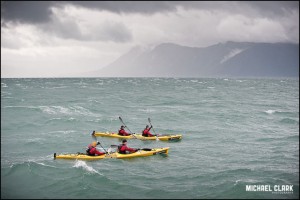
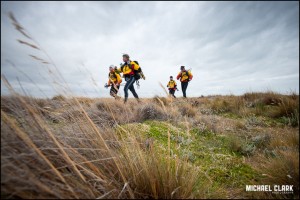
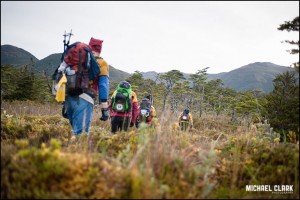
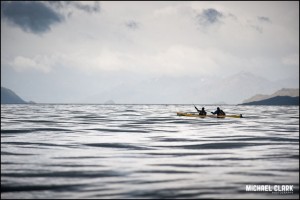
And the Patagonian Expedition Race:
Now there are important links you will want to check out, like his website and his blog.
Michael writes a newsletter 3-4 times a year, that really should be called a magazine, its full of reviews, tips, tricks, and still more of his work.
And of course there are his books.
Take a peak inside his camera bag, not only will you see the gear he shoots with, you'll be able to read reviews on all of the equipment as well, it might help you in purchasing the special piece of equipment you've been looking for.
If you are interested in attending a Michael Clark workshop (and who wouldn't be) he has two this August (in Maine Michael will be teaching on the subject of Adventure Photography and Chicago will be a Mentor Series Photo Trek), you can also find him in Santa Fe in October (another Photo Trek, this one of the Albuquerque International Balloon Fiesta), and you can shoot surfing with him (and Brian Bielmann) at Turtle Bay Hilton Resort, Oahu North Shore, Hawaii.
You can find the details for all these workshops right here.
Should consider these or any other workshops be sure to read the article Michael wrote that covers how to choose a workshop and what our responsibilities as attendees are in preparing for a workshop, he provides great insight and it will help everyone get the most for their money and their time.
I feel fortunate to have "discovered" Michael Clark and want to make sure others do so as well, because he has so much to offer.
Enjoy everyone.
Feel free to listen to the podcast right here, or head over to The Photography Podcast and check out this and all the other shows.
Images of/from Italy...
There are a few of our blog readers who are traveling and have been kind enough to post some of there (outstanding) travel images on the Weekly Photo Tips Flickr Group.
Today we are going to Italy with (Flickr name) D2.
Be sure to check out his photo stream for more of his images from Italy, you will not be disappointed.
These images make me want to get on the next plane.
Photoshop CS6 resources, for learning & buying...
If you have Adobe Photoshop CS6 (or are considering making the purchase) and you want to get up to speed with it (or just want to know what's new and different before you buy) we have a few resources here for you today.
1. The Photoshop CS6 Launch Center from Scott Kelby/NAPP
2. Understanding Photoshop from Richard Harrington
3. The Adobe Creative Suite Podcast from Terry White
4. Photoshop Killer Tips with Mat Kloskowski
5. Photoshop for Digital Photographers
6. Photoshop User TV
7. 25 Best Photoshop CS6 Tutorials from Smashing HUB
8. 20+ Creative Adobe Photoshop CS6 Tutorials from PixelPetal
9. Photoshop CS6 Tutorials: 30+ New Tips And Tricks from Designrfix
10. Photoshop CS6 for Photographers with Chris Orwig
Now, if you have not yet made the investment there is a less expensive option for you, the catch is, you need to have either a student or a teacher in your house.
Journey ED is an academic software seller and you can save about 75% on the full version of Adobe Photoshop CS6 software (not upgrades).
Here are two options:
Adobe Photoshop CS6 Extended (Windows and Mac) is just $248.
Adobe Creative Suite 6 Production Premium (Windows and Mac), which includes Premiere Pro, After Effects, Photoshop, Audition, Illustrator, Flash, and more is only $448.
Flashes of Hope, important photography...
I just happened to be watching the news over the weekend (something I usually avoid and I'll spare you the reasons why), and this story came on... I was riveted.
And moved.
So much so that as soon as it was over I went to their website and signed up to offer my services.
Their website says it far better than I could:
"Flashes of Hope is a nonprofit organization that changes the way children with cancer and other life threatening illnesses see themselves through the gift of photography and raises money for pediatric cancer research.
The portraits, taken by award-winning photographers, help children feel better about their changing appearance by celebrating it. For families of terminally ill children, it's especially important to have a portrait that preserves forever the beauty, grace and dignity of their child.
Our goal is to photograph every child until every child is cured."
If you would share this post, and most importantly the work being done by Flashes of Hope I would be forever greatful.
A "Beauty" of a deal...
One of my favorite lighting modifiers is my Speedlight beauty dish and it's one of my favorites for several reasons:
1. I love the light it gives me
2. It's very easy to use
3. And it's extremely portable
It also easily customizable, just 2 of pieces of printer paper and 4 clothes pins and you have instant barn doors. Another option is paper + tape = snoot, but be sure to attach it to the beauty dish with gaffers tape (or much less expensive hockey tape) so no sticky residue is left behind.
If you are leaning towards the "buy one" option I have something for your consideration.
Adorama has a 12 inch beauty dish kit that is $84 (with free shipping) and comes with everything you would possibly need.
It includes a mounting bracket that will allow it to fit onto any tripod or light stand, it comes with two center rings - one deflector AND one diffuser, it also comes with a honeycomb grid, and a washable fabric diffuser sock (with a heavy duty elastic band to hold it securely in place).
So you can follow this link and learn how to make your own beauty dish, or follow this link to buy one that will give you just a few more (lighting) possibilities.
Softbox or Umbrella, part II...
Here is part II from photographer Joe Farace, and in both of these posts he compares the kind of lighting
you will get from an umbrella vs. a softbox.
Be sure to checkout the sample images near the end of this post and see how the light source impacts the catchlight in a subject’s eyes.
To learn more about Joe, his photography, and his workshops be sure to check
out his website and
his blog.
Now for part II with Joe Farace:
In portrait photography lighting, the
shape of the light source — a soft box, umbrella, or anything else — can
create different kinds of effects. Let's compare several popular soft
box shapes.
A light bank or softbox for flash
emulate the soft, directional lighting produced by window light. A softbox is usually rectangular, but it can be any shape; in fact, the shape
of your light bank/softbox (same thing, really) can make a big
difference in shaping the quality of your portrait photography lighting.
Long, thin lightbanks that emulate stage footlights are called
striplights, and produce dramatic portrait lighting. Lightbanks can also
be octagonal and produce a direct yet wraparound light source with an
even light spread. Like traditional softboxes, striplights and octagonal
lightbanks are available from many sources including Photek, Westcott, Elinchrom, and Flashpoint.
An affordable alternative to the octagonal lightbank is to use a white umbrella in “shoot-through” mode by firing the flash directly though the fabric. Because the flash is not enclosed, some output is lost as light spills out the sides. Umbrellas usually have 16-ribs, so light quality is not quite the same as an octagonal softbox. In a future installment, I’ll do a shoot-off between and an umbrella in shoot-through mode and an octagonally-shaped lightbank, so you can make up your own mind. In the meantime, let’s see what these different kinds of softboxes can do.
To show the differences, I shot a test using three different shaped Flashpoint PZ Soft Boxes. These lightbanks are available in various sizes and come with baffles, recessed fronts to control directionality, and a carrying case. To attach these softboxes to your monolight/head you’ll need a speed ring that costs from around $20 (Flashpoint) to ($39.95 Profoto) In my tests, a Flashpoint 620M monolight was placed in the same place for each shot. Output was set between one-quarter and one-half power and the lightbank’s shape produced differences not only in how the light fell on the subject but on the gray seamless background as well.

For this unretouched photograph, a single 36 x 48-inch Flashpoint PZ Softbox ($119.95) was placed at camera right. Exposure with a Canon EOS 5D and 28-135mm f/3.5-5.6 IS USM lens was
1/125 sec at f/10 and ISO 100. In each of the examples, the background
becomes darker or lighter depending on the shape of the light from the
softbox. © Joe Farace

Here I used a 12 x 36-inch Flashpoint PZ Softbox
($79.95) aka striplight, although the Adorama web site (as I write
this) does not call it that. The light is at camera right and the
exposure with Canon EOS 5D and Canon EF 28-135mm f/3.5-5.6 IS USM was 1/125 sec at f/8 and ISO 100. © Joe Farace

This is the set-up that was used for each example. In this case the 12 x 36-inch Flashpoint PZ Softbox
is shown in place. Special thanks to model Amber Nicholson for
recreating her pose under each set-up. Although I had three lightbanks, I
only had one speed ring and had to dismount, disassemble, and assemble a
new light modifier before making each portrait! © 2012 Joe Farace

If any lightbank could be called the Goldilocks light source it would be the Octabox. It provides a wraparound soft light and seems to be the perfect light source. Exposure with Canon EOS 5D and Canon EF 28-135mm f/3.5-5.6 IS USM lens was 1/125 sec at f/10 and ISO 100. © Joe Farace
Different kinds of soft boxes create differently shaped catchlights in a subject’s eyes. Catchlights are specular highlights from a light source and draw attention to the subject's eyes. A catchlight is not the same thing as red-eye, which is an undesirable effect, created by the reflection of light from the retina inside the back of the eyeball. Catchlights are aesthetically pleasing and the type of light source and placement affects their size. It’s a little thing, but paying attention to lots of little things can make a portrait more than just a snapshot.
Different kinds of soft boxes create differently shaped catchlights in a subject’s eyes. Catchlights are specular highlights from a light source and draw attention to the subject's eyes. A catchlight is not the same thing as red-eye, which is an undesirable effect, created by the reflection of light from the retina inside the back of the eyeball. Catchlights are aesthetically pleasing and the type of light source and placement affects their size. It’s a little thing, but paying attention to lots of little things can make a portrait more than just a snapshot.

Here are catchlights from the three different lightbanks used in this test. L to R: The catchlight from the 36 x 48-inch Flashpoint PZ Softbox looks like it was created by a window, so the effect appears natural. The catchlight from the 12 x 36-inch Flashpoint PZ Softbox is long and thin, mimicking the shape of the lightbank, but windows can have that shape too. The third catchlight is from the 36 x 36-inch PZ Octabox looks almost as if it was created by an umbrella but without the shadows produced by a bumbershoot’s ribs. © 2012 Joe Farace
The purpose of this test is not to pick a winner, but to show the effect of changing the shape of a lightbank when lighting a subject. The Octabox may be a Goldilocks light source but if you want to add drama, a striplight might be the right choice for a specific subject. And if you want a window light look, you can’t beat a big rectangular softbox. The takeaway is that you need to match the light source to the kind of portrait you’re trying to create and not all portraits should look alike because not all people look alike.
The purpose of this test is not to pick a winner, but to show the effect of changing the shape of a lightbank when lighting a subject. The Octabox may be a Goldilocks light source but if you want to add drama, a striplight might be the right choice for a specific subject. And if you want a window light look, you can’t beat a big rectangular softbox. The takeaway is that you need to match the light source to the kind of portrait you’re trying to create and not all portraits should look alike because not all people look alike.
Softbox or Umbrella, which should you use?...
Here is an article by photographer Joe Farace, in it he compares the kind of lighting
you will get from an umbrella vs. a softbox.
The answer to the question "which should I use" will not come from what you
read, but from what you see, because Joe does a great job showing how the
subject is lit using both. After seeing how each will light your subject (and
how much they cost) it you be up to you to decide which one you end up with.
In part two tomorrow Joe will show us how the shape of the light source (be
it softbox or umbrella) impacts our photograph, right down to the shape of the
catchlight in a subject’s eyes.
To learn more about Joe, his photography, and his workshops be sure to check
out his website and
his blog.
Ladies and gentlemen, Joe Farace:
What kind of light modifier should
you use? Here's why Umbrellas are great to start with, but lightbanks
give you added directionality and control.
Portrait
lighting has four major characteristics: color, direction, quantity,
and quality. When working with light sources—from speedlights to
monolights—the best way to improve the light’s quality is with a
modification device such as an umbrella or a lightbank. Each light
modifier has its own unique advantages and disadvantages. No matter
which one you chose, both devices are governed by the same important
rule: The closer that a light source is placed near the subject the
softer it is; the further away the light source is, the harder it
becomes. So let’s get to the differences between an umbrella and a
softbox.
 Umbrellas can be downright cheap. A
33-inch Flashpoint White Interior Umbrella
costs lest than fifteen bucks! They are also easy to use, because if
you’ve ever opened a rain umbrella you’re halfway to knowing how to use
one. Umbrellas produce a broad and soft source of lighting that could,
for the sake of simplicity, be considered to emulate outdoor lighting.
When used in the traditional position, umbrellas produce indirect,
bounced light that may require more flash output from the light source
you’re using. Because umbrellas produce broad lighting, they are easier
for beginners to use. You point an umbrella at a subject and bang,
you’ve got soft lighting! Use two of them and you’ll think you’re a
lighting genius.
 Lightbanks,
which are often called softboxes, are usually rectangular but can also
be octagonal or square. They emulate the soft, directional lighting
produced by window light. The key word here is directional. Lightbanks
are the light modifiers that many big time photographers use so that’s
what many beginning photographers aspire to as well. Because your flash
fires directly through a lightbank, it produces direct lighting, even
though the lightbank may have a diffusion panel in front of the flash
tube to soften the flash. Because you're shooing through rather than
relying on reflected light, your flash requires less power output than
when using an umbrella to obtain the same lens aperture. Softboxes are
available in many sizes, including large ones that, when placed close to
a subject, produce very soft, yet directional light. There are lots of
accessories available for lightbanks, which as grids or louvers, that
make the lighting even across the plane of light.
To show you the visible differences between an umbrella and a softbox, I shot a comparison test using two large light sources. In this corner was a white Flashpoint 16-rib 64-inch parabolic umbrella ($44.95) In the opposite corner was a 36x48-inch Flashpoint PZ Softbox ($119.95) As you can see, even an inexpensive lightbank, like the PZ series, isn’t cheap so all that directionality comes with a price. For my test shots I didn’t use any fill light or reflector because I wanted you to see the total effect of the light modifier that was used.
 Umbrellas can be downright cheap. A
33-inch Flashpoint White Interior Umbrella
costs lest than fifteen bucks! They are also easy to use, because if
you’ve ever opened a rain umbrella you’re halfway to knowing how to use
one. Umbrellas produce a broad and soft source of lighting that could,
for the sake of simplicity, be considered to emulate outdoor lighting.
When used in the traditional position, umbrellas produce indirect,
bounced light that may require more flash output from the light source
you’re using. Because umbrellas produce broad lighting, they are easier
for beginners to use. You point an umbrella at a subject and bang,
you’ve got soft lighting! Use two of them and you’ll think you’re a
lighting genius.
  Lightbanks,
which are often called softboxes, are usually rectangular but can also
be octagonal or square. They emulate the soft, directional lighting
produced by window light. The key word here is directional. Lightbanks
are the light modifiers that many big time photographers use so that’s
what many beginning photographers aspire to as well. Because your flash
fires directly through a lightbank, it produces direct lighting, even
though the lightbank may have a diffusion panel in front of the flash
tube to soften the flash. Because you're shooing through rather than
relying on reflected light, your flash requires less power output than
when using an umbrella to obtain the same lens aperture. Softboxes are
available in many sizes, including large ones that, when placed close to
a subject, produce very soft, yet directional light. There are lots of
accessories available for lightbanks, which as grids or louvers, that
make the lighting even across the plane of light.
 To show you the visible differences between an umbrella and a softbox, I shot a comparison test using two large light sources. In this corner was a white Flashpoint 16-rib 64-inch parabolic umbrella ($44.95) In the opposite corner was a 36x48-inch Flashpoint PZ Softbox ($119.95) As you can see, even an inexpensive lightbank, like the PZ series, isn’t cheap so all that directionality comes with a price. For my test shots I didn’t use any fill light or reflector because I wanted you to see the total effect of the light modifier that was used.

This is the lighting set-up that I used for my test in my 11x15-foot in-home studio. A Flashpoint 620M monolight
was placed at camera right, just outside the frame. My first shot was
with the 36x48-inch Flashpoint PZ Softbox and then later I used an
umbrella the monolight was in the same location. ©2012 Joe Farace

To give me an f/8 aperture and
achieve the kind of depth-of-field I like when making a three-quarter
length portrait, I set the power on the Flashpoint 620M
between one-eight and one-half power using the monolight’s continuously
variable output knob. No reflector was used, only the light from the 36x48-inch Flashpoint PZ Softbox and the exposure was 1/125 sec at f/8 and ISO 100. ©2012 Joe Farace

To make sure nothing moved when I switched to an umbrella, I placed gaffer’s tape on the floor to position the Flashpoint 620M now with Flashpoint 16-rib 64-inch parabolic umbrella mounted.
Two things happened: One that’s obvious and one that’s not. The obvious
thing is that the lighting is much broader, softer with less modeling
on the subject’s face and there’s more light spilling onto on
background. What is not apparent is that because the light is bounced
the quantity is less, so my exposure setting changed to 1/125 sec at
f/6.3 and ISO 160.
Unlike umbrellas that are forgiving, lightbanks require some basic knowledge of balancing the main versus fill light (that fill could even be an umbrella or just a reflector) so it won’t produce overly contrasty lighting (unless, of course, that’s what you want) Softboxes are also slightly more complicated to set up although Flashpoint’s series of PZ Softboxes are the easiest to assemble that I’ve ever used. But choices are what this whole discussion is about. You select the light modifier that matches the kind of portrait you’re trying to make. Sometimes that will require an umbrella, and sometimes it’ll be a lightbank. There is no “one size fits all” solution to lighting. Just as you will select the right lens and ISO for a natural light photograph, when it comes to working with artificial light you need to select the right tool for the job.
Unlike umbrellas that are forgiving, lightbanks require some basic knowledge of balancing the main versus fill light (that fill could even be an umbrella or just a reflector) so it won’t produce overly contrasty lighting (unless, of course, that’s what you want) Softboxes are also slightly more complicated to set up although Flashpoint’s series of PZ Softboxes are the easiest to assemble that I’ve ever used. But choices are what this whole discussion is about. You select the light modifier that matches the kind of portrait you’re trying to make. Sometimes that will require an umbrella, and sometimes it’ll be a lightbank. There is no “one size fits all” solution to lighting. Just as you will select the right lens and ISO for a natural light photograph, when it comes to working with artificial light you need to select the right tool for the job.
Subscribe to:
Comments (Atom)


