If you have not seen the work of Dave Hill you need to, please take a minute (or 10) and look at his incredible images.
Now to imply that the technique I am about to show you is "just like Dave Hill's" would be a like saying my child worn minivan is just like a Ferrari. The only similarities is that they both have license plates, after that all similarities come to an end.
Though the ladies do love my minivan, as it is the "sport" version.
;)
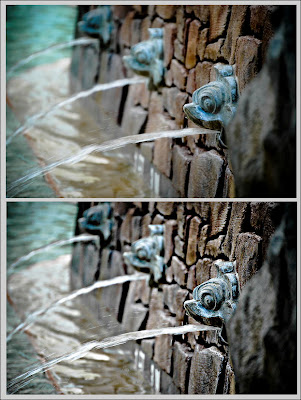
Anyway, the technique I am going to show you will give your images a cool gritty look and works on most images, but it does work best on high key images. Below are several of my examples.
And though it looks like a lot of steps, after you have done it a couple times it will take you only about a minute to complete (really).
So here goes:
Step 1:
Open your image in Photoshop and create a duplicate the layer.
Go to "Filter" - "Other" - "High Pass" set the Radius to 4 Pixels.
On the Layers palette select the "Vivid Light" blending mode.
Flatten the image.
Step 2:
Create a duplicate the layer (again).
Go to "Filter" - "Other" - "High Pass" set the Radius to 7 Pixels.
On the Layers palette select the "Color" blending mode with an opacity of 40%.
Flatten the image.
Step 3:
Create a duplicate the layer (one last time).
Go to "Filter" - "Blur" - "Gaussian" set the Radius to 9.5 Pixels.
Go to "Filter" - "Noise" - "Add Noise" set Amount to 3%.
Got to "Layer" - "Layer Mask" - "Hide All"
Now use the lasso tool and select only the eyes (assuming the image has eyes, for multiple selections hold the shift key).
Go to "Select" - "Refine Edges" - set "Feather" to 5-6 pixels, then "Select" - "Inverse"
Select the brush on your tool palette, set the brush opacity to 30% and brush over the entire image once.
Flatten the image.
Step 4:
Go to "Filter" - "Sharpen" - "Unsharp Mask" and use the following settings:
Amount 100%
Radius 30.0 pixels
Threshold 0 Levels
That's it, give it a try, and I would love to see your results.
If you click on any of the images below they will open larger and in a new window so you can have a better view of how the effect has changed each image.
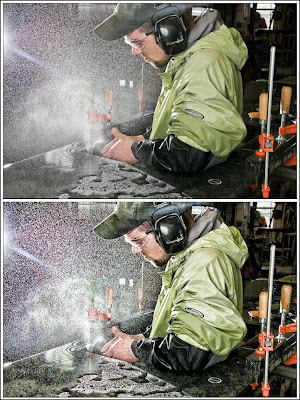
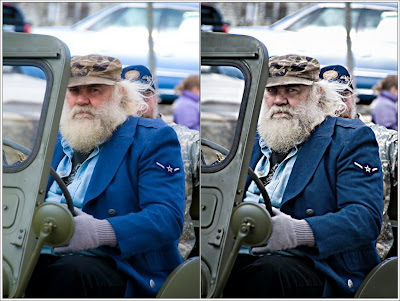
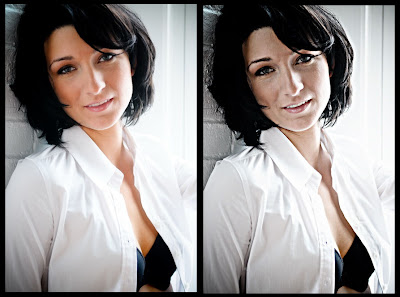
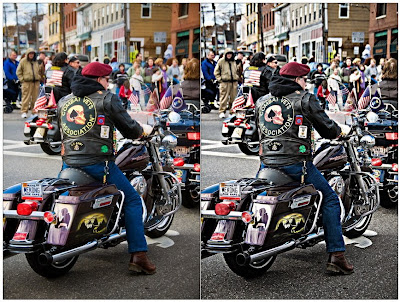

9 comments:
Really great job on this. How long did it take you? I have been meaning to touch up my digital photo software skills.
The first few times it would 4-5 minutes... but after I did a few and better understood the process I can easily do an image in under a minute.
Thanks for stopping by the blog.
Cool effect Scott. Thanks for sharing, can I ask how you came up with this. I can follow the steps to duplicate what you have created but how do you think to be able to create an effect like this in the first place? I can now do the effect faster then 4-5 minutes. I recorded an action to do it for me! I may have to use this effect on an image for my photo blog - if I can find the right image to use.
Steve,
I am so brilliant that these just come to me in my sleep.
;)
Honestly, it was a technique that I was shown a couple years ago and that I modified slightly, but I can’t remember who showed me.
Cool idea about the action.
So there are happy times in your area with the Packers, huh?
Not so much here in Patriot land.
Scott,
Thanks for the response. Now my bubble is burst as I know that you are not as brilliant as I thought you were. Yes, all is well in Wisconsin with the Badgers making it to the Rose Bowl this year and the Packers bringing the Lombardi Trophy home to where it belongs. AND we beat the bears in the NC playoff game as a bonus. I am sure the Patriots will be in the hunt again next year - providing we have a football season.
nice,thanks for sharing the tutorial
Wow, I have been rediscovering PS after getting LR3 and finding some great things to do there and thyis technique and using the high pass filter was awesome as it uses something (high pass) that I am only just discovering. Love it Love it. I tried two pics and they look awesome!
dammit i have serif not photoshop but will have a play this weekend and let you know the settings fer any peeps using that prog love the effect been looking for a tutorial on it for ages thank you very muchly
I just checked out Dave Hill's site. Very creative stuff. But the really cool things on his site are the Behind The Scenes videos of his location shots. If you haven't clicked on the Behind The Scenes tab, you're really missing some great stuff! Very educational. Thanks very much, Scott!
Post a Comment