The first set of images are from one of this years weddings.
Here is the original image:
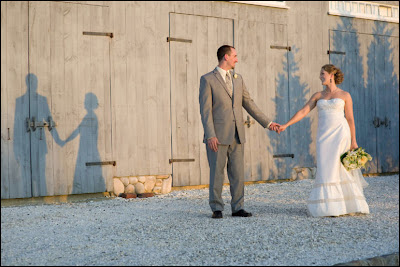 And I wanted the shadow that was cast in this image:
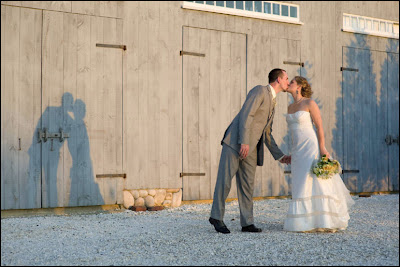 So I copied the the left half of the image of the shadow I wanted and brought it into image one. I dropped the opacity so I could see through it and then used free transform to get the boards on the side of the barn correctly aligned in both images.
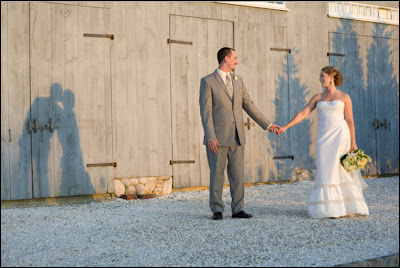
I then created a layer mask for each of the two layers and using black hid the section of the barn that had the shadow of the bride and groom standing separately, then using white I painted over the "kissing shadow" to have it show through.
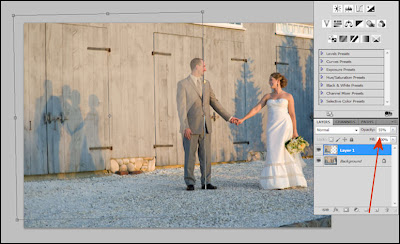 The final step was to burn the shadow slightly to make it a bit more prominent, and here is the final image:
In this next set of images it's a bit different. Here is the original image:
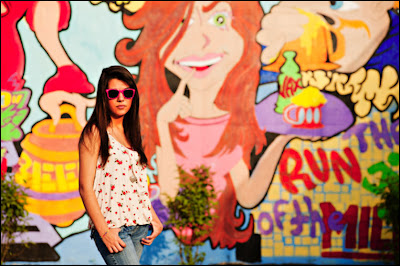 There was no shadow at all and the shot itself was a bit serious which does not reflect the fun personality of this young woman so I grabbed one of the "more fun" images and using the quick select tool grabbed just her from the shot. As I was going to use it as a shadow a precise cutout wasn't needed so I was happy with what quick select gave me.
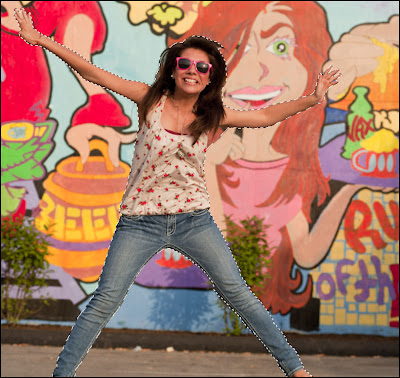 I then brought the selection of her jumping into the original picture.
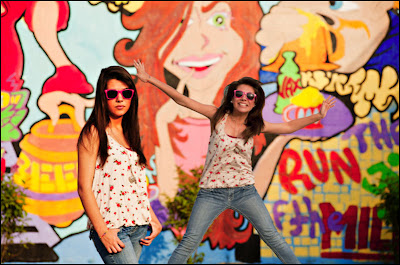 With the "jumping" layer selected I selected the "Lock Transparent Pixels" icon (visible right next to the paint brush above the layer). I then filled it with black (option+delete for MAC or Alt+Backspace for PC).
Next I applied the Gaussian Blur with the radius set to 20 pixels and then dropped the opacity to (around) 60%.
Because there was a bush in front of the wall where the shadow fell I used a layer mask to remove some of the shadow off the bush to make it look just a bit more natural in how the shadow fell over the leaves.
Here is the final shot:


8 comments:
I love reading this blog because it makes me want to go out and shoot and try out these tips! Scott, I need to finish my PhD, so pleeeassse stop posting these tips so frequently! JK ... I'm trying this out on Sunday after the Gator game
This is one of your best tips to date. Thank you!
Great tip :-)! Can't wait to try it!
VERY cool! Thanks for sharing!
Two great ideas, I am am going to try to have a little fun like this with photos for my photo blog. Your post has also got me thinking of another type of photoshop fun with photographs I may try. Thanks for the post
Thanks for sharing these!! Totally awesome and creative!!
Nice work with the wedding couple.
Miguel...ignore this blog, and finish your PHd....then come back and see what you been missing...it will still be here.
Post a Comment